My Options
You can create multiple Self Service portal menu panes, configuring the order of the menu item links and section headings, renaming them and regrouping as needed, as well as creating new menu links and section headings.
The steps are as follows:
- Choose/create the My Option menu, as described below.
- Use Designer to modify font, color and background.
- Assign the new My Option to the Self Service portal system.
Creating a My Option
Before you start
You must have Self Service Portal Setup enabled within your General Access Security Role in order to configure any Self Service administration settings.
-
Select Menu
 , then Admin, then System Administration. The System Administration window is displayed. In the Explorer pane, expand Self Service Portal.
 - Select Self Service Portal My Options to open the window
 .
. - A browse table displays all of the existing My Options. Default and Classic are provided as standard.
- To create new My Option Menu select Add beneath the browse table to create a new row. Click inside the new row and then type the name of the My Options item you want to create.
- Below the browse table, the following fields are displayed:
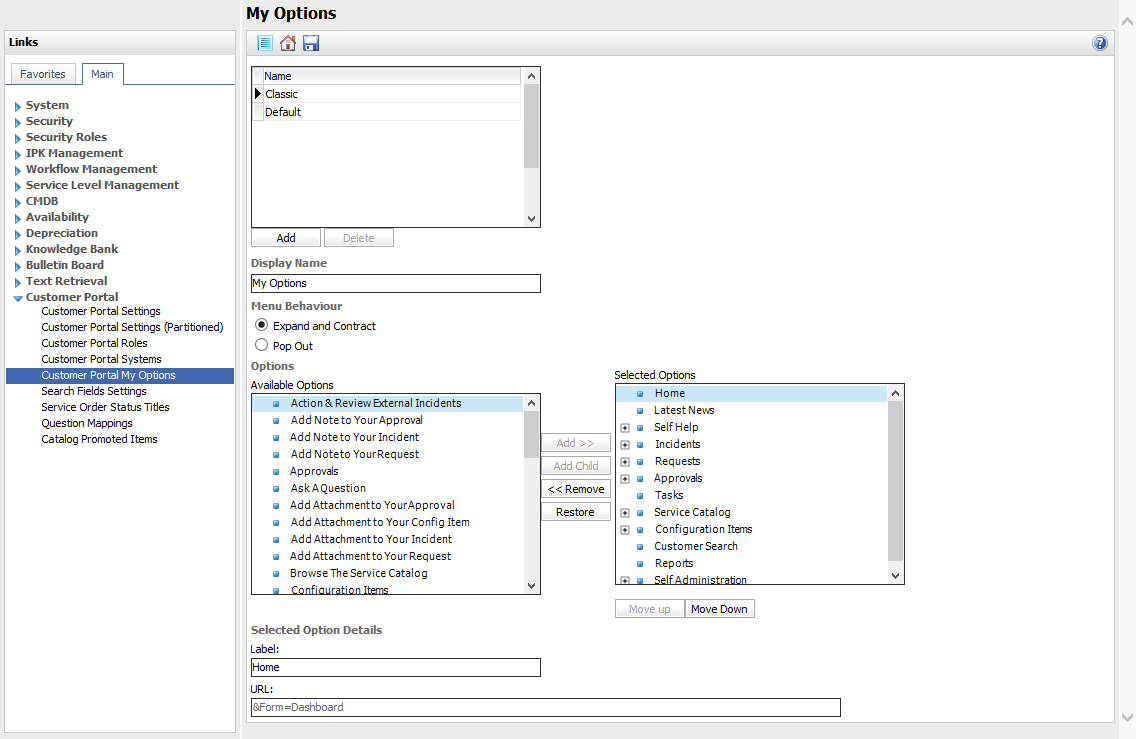
| Display Name |
|
| Menu Behavior |
Choose the behavior of nested lists when their section titles are selected
|
| Options |
The Available Options list shows all options that can be displayed in the pane, and Selected Options lists those items that currently appear. The |
| Selected Option Details |
The Label and URL of the item selected in the Selected Options pane.
|
Creating and Updating Options
You can add and delete options that are displayed in your My Options menu, as well as changing the order in which they are displayed, and organising them into sections.
- To add an option at the top level, select it in the Available Options table and then select Add.
- To create a section title, select Custom Option in the Available Options table and then select Add. In the Selected Option Details overwrite its Label value with the title you want for the new section. Leave the URL field blank.
- To add an option so that it appears within a section, select the section title in the Selected Options table, then select the option you want to add from Available Options, and select
 . The section title will now show
  beside it, if it was not already there.
 -
If
is grayed out, you have selected an option in Selected Options that contains a URL, and therefore is not a section title. Options can only be added as child items to section titles.You can create several layers of submenu options, by creating sections as children, and then further sections as children of this submenu.
- To reorder the display of the options, use the
 and
and  buttons.
 - To remove an option from the menu, select
 .
. - To restore the default settings, select Restore.
- To create new menu options, select Custom Option from the left pane and add it to the right pane, then complete its details in the Selected Option Details settings. Learn more about Configuring URLs for Custom Options below.
- Select
 to save the changes. Provide the Change Reasons if prompted to do so.
If you have permission to access the Designer through your security role, you can change the look of the My Options menu pane by redesigning its features in the Skins tab of Designer.
Configuring URLs for Custom Options
URLs can be a link to a page within the Self Service Portal, such as to a specific knowledge article, or to a web page outside of it such as a third-party homepage.
To link to pages outside the Self Service Portal you must enter the full address beginning with www, http, or https.
To link to pages within the Self Service Portal, you do not need the full address in the URL, you only need to include the portion of the URL that follows ?LITE.
For example the full address for the Self Service Portal Knowledge Search page is http://<server>/<virtual_directory>/Core.aspx?Lite&Form=KnowledgeSearchCriteria so you would enter &Form=KnowledgeSearchCriteria into the URL field.
See URLs and Access Parameters to learn more.
Updating a My Option
Before you start
You must have Self Service Portal Setup enabled within your General Access Security Role in order to configure any Self Service administration settings.
-
Select Menu
, then Admin, then System Administration. The System Administration window is displayed. In the Explorer pane, expand Self Service Portal. - Select Self Service Portal My Options to open the window .
- A browse table displays all of the existing My Options. Default and Classic are provided as standard.
- Select the My Option menu you want to update.
- Make the necessary changes.
Deleting a My Option
Before you start
You must have Self Service Portal Setup enabled within your General Access Security Role in order to configure any Self Service Portal administration settings.
You cannot delete the system defined My Options titled Default and Classic.
Once deleted, My Options cannot be restored.
-
Select Menu
, then Admin, then System Administration. The System Administration window is displayed. In the Explorer pane, expand Self Service Portal. - Select Self Service Portal My Options to display a browse table of existing My Options.
- Select the My Option you wish to delete and select Delete. If the button is grayed out you have selected a system defined option which cannot be deleted and must select a different option to delete.
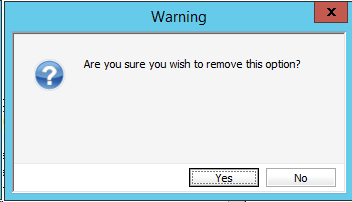
- A warning dialog box appears for you to confirm your choice
 . Select Yes to continue or No to cancel.
 - The deleted My Option disappears from view, but it is not yet deleted from the system.
- Select to save the changes. Provide the Change Reasons if prompted to do so.